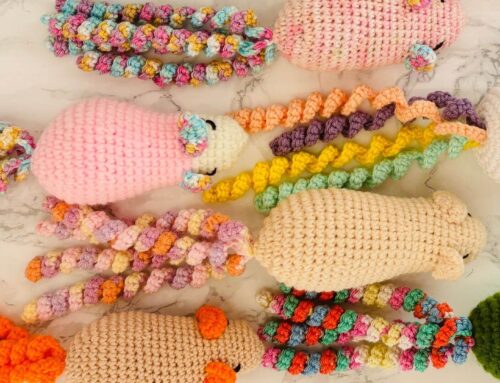
Yarn dyeing is a creative and deeply satisfying hobby. Today is all about How to Dye Your Own Yarn: A Beginner’s Guide with 5 Essential Tips. Want to start dyeing your yarn? Read on for all the ins and outs.
I started dyeing yarn myself two years ago after I randomly came across a video about dyeing wool while watching a bag tutorial on YouTube. My curiosity took over, and I decided to give it a try. I ordered a few skeins of sock yarn, bought some food coloring online, and got started. After a lot of trial and error, I was incredibly happy with the results. If you’re considering dyeing yarn, here are 5 essential tips to help you get started. Plus, we answer some frequently asked questions about alternative dye methods.
5 tips to get your started on your journey
Below I wrote down 5 tips I wish somebody had given me before I started dying yarn.
Tip 1: Not All Yarn Types Are Suitable for Dyeing
It may seem obvious, but beginners often forget that not all yarns can be dyed with every method. My first experiment was with sock yarn and food coloring, which works well for animal fibers like wool. However, if you want to dye acrylic or cotton yarn, you’ll need a fabric dye such as Dylon. For wool and other animal fibers, you can use food coloring. Start by soaking the wool in water with a bit of vinegar to open the fibers, then apply heat to set the color. It’s important to know that food coloring does not work on plant fibers like cotton—something experienced dyers have proven time and again.
Tip 2: Start Small — Don’t Dye All Your Yarn at Once
While it may look exciting on social media when professional dyers work with large vats of yarn and vibrant colors, remember that these people have years of experience. If you’re just starting out, don’t rush to buy expensive equipment. You don’t need a commercial hot plate or professional dye pots. Instead, begin with an old pot on your stove and experiment with food coloring. Once you’ve mastered the basics and know this hobby is for you, you can invest in tools like a hot plate, which gives you better control over temperature and color application.
Tip 3: Wear Gloves and Old Clothes
This may sound like a no-brainer, but in the excitement of creating something new, safety can be overlooked. Always wear old clothes when dyeing yarn, as spills and splashes are common. You don’t want your favorite jeans permanently stained. Gloves are also essential. Whether you use fabric dye or food coloring, your hands will quickly become discolored. Food coloring may wash out more easily than fabric dye, but it’s still best to protect your skin. I learned this the hard way when a tiny hole in my glove left me with a brightly colored thumb for a week. Also protect your workspace—avoid working on carpet or cover the area with plastic or cardboard to prevent damage from accidents.
Tip 4: Prepare Your Yarn Properly
When you buy yarn for dyeing, it often comes in skeins—loops of yarn held together with a contrasting tie. If you’re starting with regular yarn balls, you’ll need to convert them into skeins before dyeing. A yarn winder is a handy tool for this, and you can easily find one online. Simply attach the yarn end to the winder and turn until the ball becomes a large loop, perfect for dyeing.
Tip 5: Be Selective with Your Color Choices
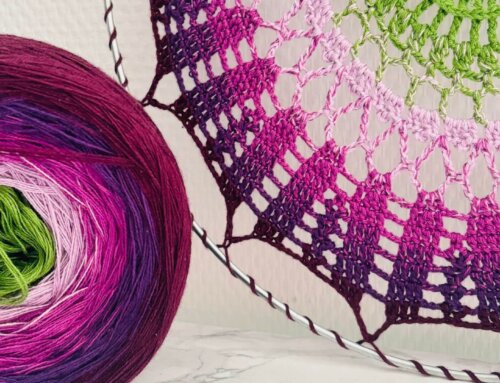
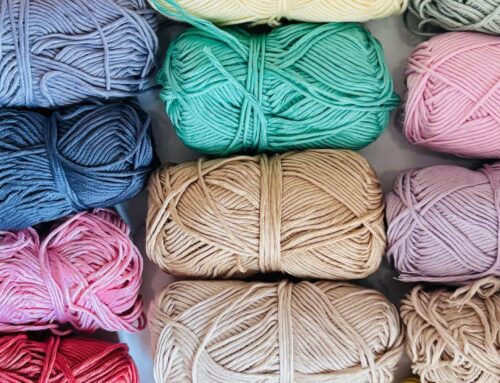
While experimenting with colors is fun, it’s important to be intentional with your choices. You can dye yarn in rainbow colors, but ask yourself whether you’ll actually use or sell that yarn afterward. For inspiration, browse Instagram or YouTube to see how others mix and match colors. Sometimes a single color in multiple shades can create a stunning result. If you plan to sell your yarn, make sure you have multiple skeins in the same colorway. Some people want enough yarn for a sweater, while others use it for smaller projects like scarves or doll clothes. And if you create something amazing, write down your process—including how much dye you used—so you can replicate it later.
What About Acid Dye for Yarn?
If you want to try a more professional method, acid dyeing is a popular choice for wool and other protein fibers (such as alpaca and silk). Don’t be intimidated by the name—it’s not as harsh as it sounds. Acid dyeing only requires a mild acid such as vinegar or citric acid, which helps the dye bond with the yarn fibers. Acid dyeing produces vibrant, long-lasting colors and is more permanent than food coloring. It’s widely used by experienced dyers for high-quality yarn. You’ll need specialized acid dyes (often available online) and a heat source to set the dye, but the process is relatively straightforward once you get the hang of it.
Can You Dye Yarn with Real Food or Flowers?
Yes, you can. Natural dyeing is another exciting option for yarn enthusiasts. You can use items like onion skins, avocado pits, and flowers to create beautiful earthy tones. For example, avocado pits can produce soft pink shades, while onion skins yield golden yellow colors. Keep in mind that natural dyes usually work best on animal fibers like wool, and the colors may be less vibrant compared to commercial dyes. You’ll also need a mordant, such as alum or vinegar, to help the color bind to the yarn. The results are often more subtle but can be truly breathtaking, giving your yarn a unique, organic look.
When dyeing with flowers, it’s important to research which plants are safe and effective for this purpose. Marigolds, chamomile, and madder root are just a few examples of plants that can produce beautiful colors when properly prepared.
So, which yarn will you dye first?