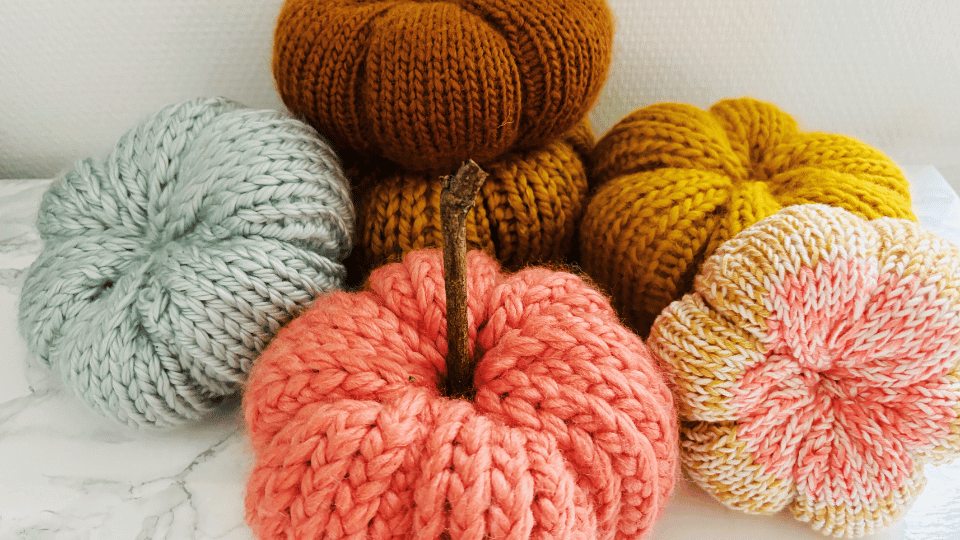
Autumn is the season of cozy sweaters, falling leaves, and of course: pumpkins! If you love knitting and want to bring some of that autumn charm into your home, why not try making your own pumpkin with a free knitting pattern? Whether you want to decorate your home or prepare for Halloween, pumpkins are indispensable at this time of year. This fun and festive project is perfect for adding a handmade touch to your seasonal décor and celebrating the beauty of autumn.
Autumn is a season of transformation, when nature adorns itself in a stunning palette of warm tones—deep red, golden yellow, and burnt orange—before the winter chill sets in. The air becomes crisper and the scent of fallen leaves fills the atmosphere, evoking a sense of nostalgia and coziness. It is a time for thick sweaters, warm drinks, and the comforting flavors of seasonal spices. Autumn also brings a feeling of reflection and preparation, as the harvest is gathered and homes are decorated with symbols of the season, such as pumpkins and gourds. Whether it is the sound of crunching leaves under your feet or the sight of a harvest moon, autumn invites us to slow down, enjoy the little things, and embrace the changes around us.
Supplies
To make this pumpkin, you will need:
- Bulky yarn: I used Katia Canada or a similar yarn
- Knitting needles size 11 with a 20 cm / 25 cm cable
- Scissors
- Tapestry needle
- Stuffing
- Optional: wooden stick or leather label
Abbreviations
- k = knit
- p = purl
Free Knitting Pattern: Pumpkin
Cast on 36 stitches onto your needle + the extra loop from the slip knot. Join in the round.
Rounds 1–18: knit 5 stitches, purl 1 stitch, repeat this pattern. You will now have 6 “sections” of 5 knit stitches separated by 1 purl stitch.
Bind off by cutting a very long tail of yarn. Thread the yarn through all stitches on your needle and cable.
Then slide the stitches off your needle. Pull the yarn tightly to close the bottom of the pumpkin.
Now start filling the pumpkin little by little!
Insert the yarn through the inside of the pumpkin toward the top. Thread the yarn through the stitches at the top.
Continue stuffing the pumpkin before fully closing the top.
Use the remaining yarn to create ridges along the purl columns of the pumpkin. Do this by pulling the yarn from the top down through the pumpkin at each purl column, tightening firmly to form the pumpkin “seams.” Repeat this at the opposite purl columns to achieve a nice, even shape.
Share your pumpkin on Instagram by tagging me! Use @dutchfiberistacom :)
Happy knitting!