Autumn is the perfect season to start cozy crochet projects, and what could be better than making your own crocheted pumpkin? This flat crocheted pumpkin is an ideal project for both beginners and experienced crocheters looking for a fun and quick decoration for Halloween, Thanksgiving, or simply to bring a bit of autumn charm into your home. With this simple crochet pattern, you can create a beautiful pumpkin in no time, which you can use as a coaster, wall decoration, or even as part of a fall wreath.
In this blog, we share a step-by-step crochet pattern for a flat pumpkin, including tips to personalize your project with fun details such as ridges, leaves, and a stem. Crochet your autumn décor with this easy pattern and give your home a warm, seasonal look. Perfect for anyone who loves DIY crochet projects for fall!
Pumpkin Base:
Round 1: Start with a magic ring. Crochet 8 single crochets into the ring. Pull the ring tight and join the round with a slip stitch in the first single crochet. (8 sc)
Round 2: Chain 1, crochet 2 single crochets in each stitch around. Join the round with a slip stitch. (16 sc)
Round 3: Chain 1, crochet 2 single crochets in the first stitch, 1 single crochet in the next stitch. Repeat this pattern around. Join the round with a slip stitch. (24 sc)
Round 4: Chain 1, crochet 2 single crochets in the first stitch, 1 single crochet in the next 2 stitches. Repeat this pattern around. Join the round with a slip stitch. (32 sc)
Round 5: Chain 1, crochet 2 single crochets in the first stitch, 1 single crochet in the next 3 stitches. Repeat this pattern around. Join the round with a slip stitch. (40 sc)
Shaping the Pumpkin Segments:
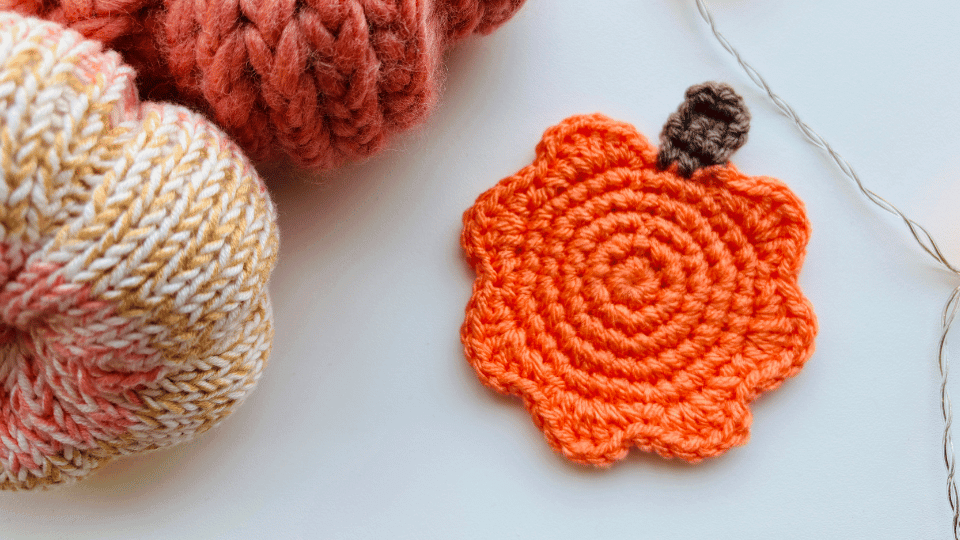
Round 6: Chain 1, crochet a combination of 1 single crochet and 1 half double crochet in the first stitch, 3 double crochets in the second stitch, 1 half double crochet and 1 single crochet in the third stitch. This forms the first pumpkin segment. Skip 2 stitches and repeat the combination in the next 3 stitches. Repeat this around to form 7 pumpkin segments. You should have about 3 stitches left at the top. Stop here and attach brown yarn for the stem.
Pumpkin Stem:
Round 7: Crochet 3 single crochets, chain 1 and turn your work. Repeat this once more. Then chain 1 and turn your work again. Crochet 1 slip stitch, 1 single crochet, and 1 slip stitch.
Cut the yarn and neatly weave in the ends with a needle.
Optional Decorations:
Pumpkin ridges: Use a long piece of yarn and a needle to wrap vertically around the pumpkin to create ridges like a real pumpkin.
Leaves: Crochet small green leaves next to the stem for an extra realistic effect.
Stuffed pumpkin: If you want a 3D effect, crochet two flat pumpkins and sew them together with some stuffing in between.
Enjoy making your own flat crocheted pumpkin and bring the beauty of autumn into your home!