A while ago, I created a cheerful baby mouse crochet pattern. It’s available for purchase on my Ravelry page, but you can find it here for free! Simply follow the pattern below and share your creation by tagging me on TikTok or Instagram.
This little mouse is very easy to make, which makes it perfect as a first crochet project. Choose your favorite cotton colors, pick a crochet hook that feels comfortable in your hand, and you’re ready to get started.
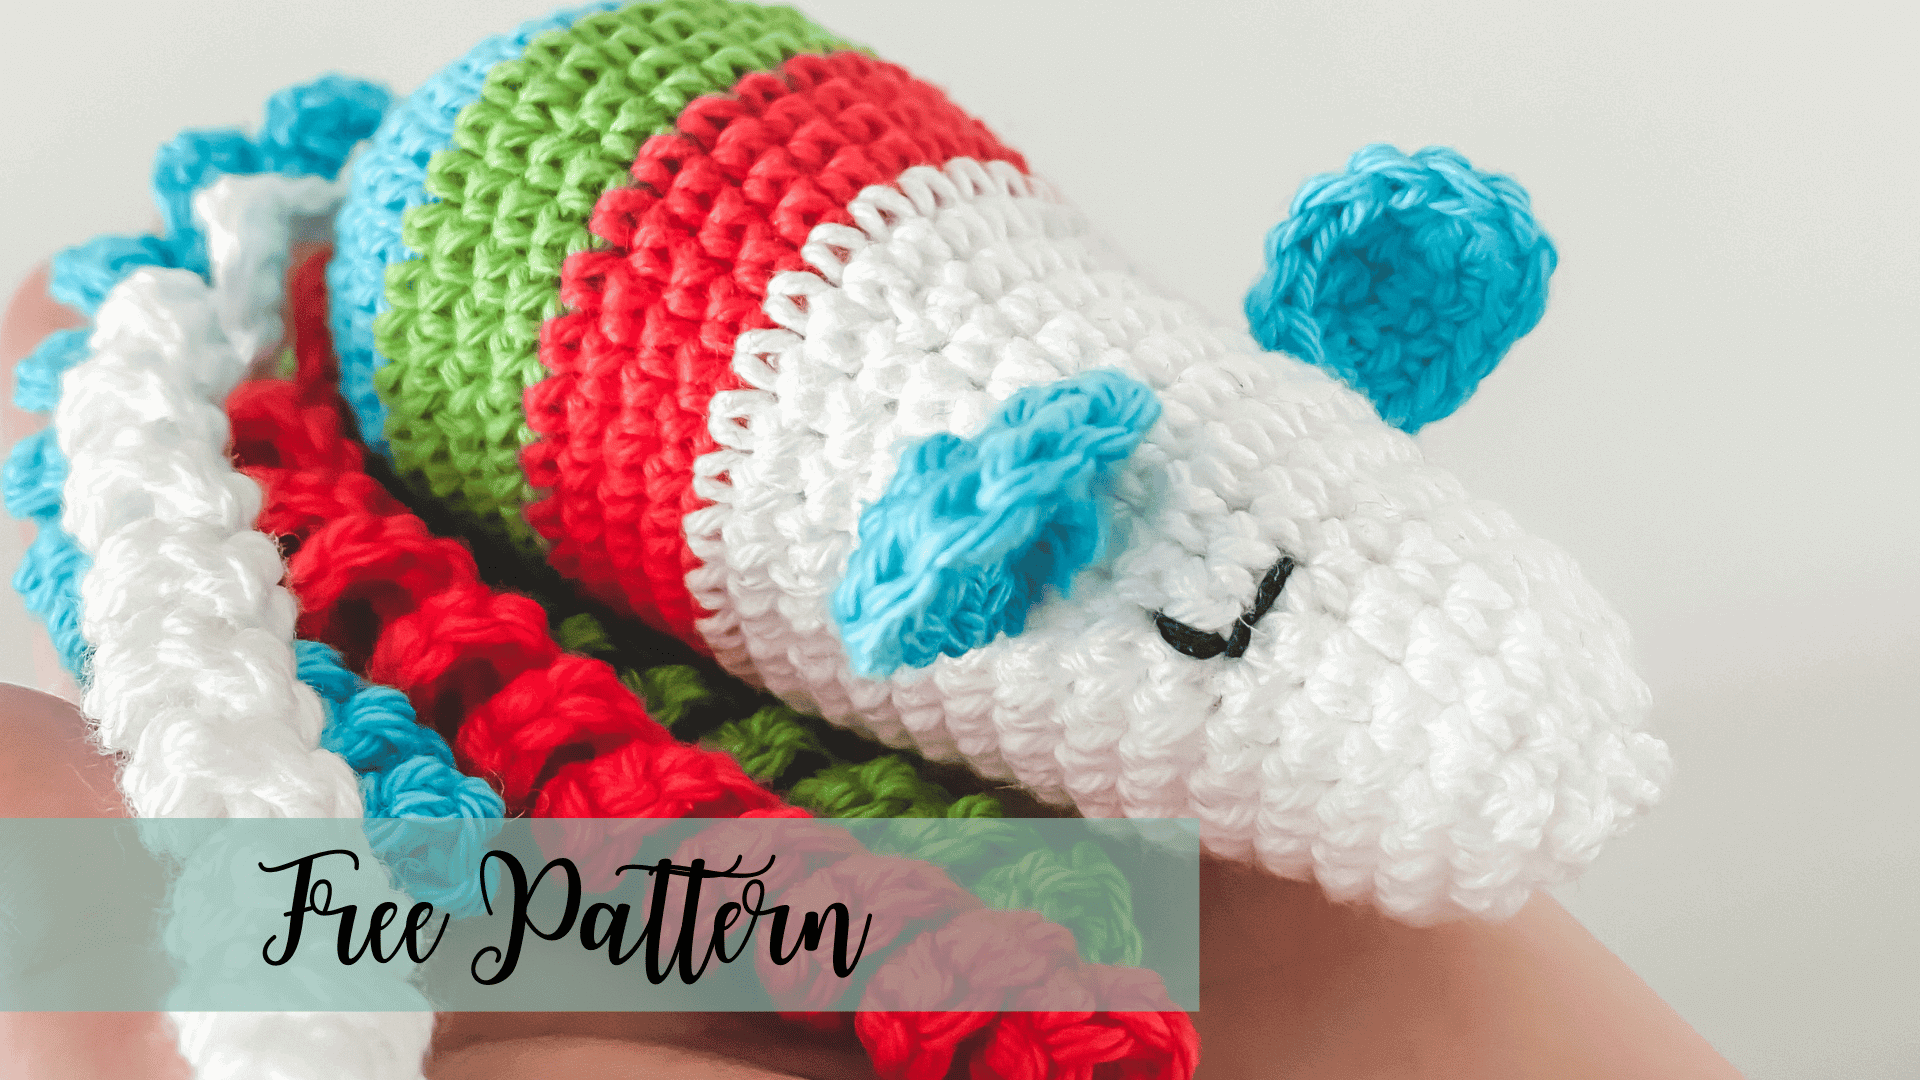
Below you’ll find the pattern and all the information you need to make this adorable baby mouse.
Pattern Information
For this mouse, I used Hobbii Rainbow Cotton 8/4. Want to change colors while crocheting? Of course you can! I once made a set of 10 identical mice as a maternity gift for a company.
Important: Please do not copy or sell this pattern as your own work. You are welcome to sell the finished product — and I would truly appreciate it if you credit me as the designer.
And please share your baby mouse with me if you’d like — I absolutely love seeing all your color variations!
Abbriviations
- CH = chain
- SLST = Slip Stitch
- SC = Single Crochet
- MR = Magic Ring
- INC = Increase
- DEC = Decrease
([..]X = Repeat between the (..) x times
(..) = Count of stitches at the end of the tour
*…* = All in the same stitch
You need
- Crochet hook 2.5 mm
- Hobbii Rainbow Cotton 8/4
- Stuffing
Pattern
If you find any mistake in the pattern, please let me know.
Tail
Make 4 in total.
Leave about 10cm of thread before starting
- Chain 46 + 1 extra as a turn-chain (46)
- Inc. in every chain back to the start. The tail will curl! (92)
- Take about 10cm and cut the yarn and pull through the loop with your hook to finish
- Make a tight knot with the 2 ends, don’t cut! You need them later!
Body
Work in continues rounds:
- R1: MR, 6 sc in MR. Pull it a bit but not completly tight. Leave the tail on, don’t cut it yet. (6)
- R2: [inc] x6 (12)
- R3: [1sc, inc] x6 (18)
- R4: [2sc, inc] x6 (24)
- R5: [3sc, inc] x6 (30)
- R6: [4sc, inc] x6 (36)
- R7-10: 36 sc
✿ Push your hook from inside to the outside through the hole of the magic loop. Now pull ALL the loose ends from the 4 tails inside. Hold the loose ends and pull on the tail of the magic ring to close the hole. Pull in the ends of the tail to make sure the tails are all against the behind of the mouse and tigh a knot inside the mouse. Now you can cut all the loose leftover ends.
Continue the mouse:
- R11: [4sc, dec] x6 (30)
- R12-17: 30sc
- R18: [3sc, dec] x6 (24)
- R19-24: 24sc
- R25: [2sc, dec] x6 (18)
- R26-28: 18sc
- R29: [1sc, dec] x6 (12)
- R30: [dec] x6 (6)
Fasten off.
Sew the thread of the end through the last outside loops of the last round and pull tight to close the gap. Weave in the end.
Ears, make 2
- R1: Chain 5 (5)
- R2: 3 sc, 3 sc in de laatste steek, go further on the other side of the chain: 4 sc, ch 1, turn work (10)
- R3: 4 sc, [inc] x3, 3 sc, ch 1, turn (13)
- R4: 13 sc
Leave a tail before cutting your yarn because you need to sew the ears to the body later.
Little fase
Sew the ears between tour 10 and 11 counted back from the nose.
Embroidery 2 black sleepy eyes on the side of the head.
Welcome little Birth Mouse
And you’re done! Please share the result on social media and tag me in it, would love to see the color combination your used. Use #dutchfiberista!